Blame it on the Three-Way
The whole solar thing began with the refrigerator. The 20-year-old Norcold 3163 in the Winnebago Rialta, a "three-way" fridge that runs on 120 VAC, 12 VDC, and propane, worked on the first two power sources but not on the third. Initially it wouldn't light. I replaced the burner, and then it would light but not stay lit. It turned out that the vent pipes were clogged with rodent debris. Once I cleaned them, the fridge would stay lit, but for reasons I never figured out despite much help from the Rialta Tech Forum, it wouldn't cool on the propane setting. This was a mystery, as a "three-way"fridge doesn't have a compressor and instead relies on the heating and cooling of ammonia. It cooled fine on electric power, and it really shouldn't care whether the ammonia is heated by its 120V / 12V electric heater or by propane. After weeks of working on the fridge, I cried uncle and looked at replacing it.
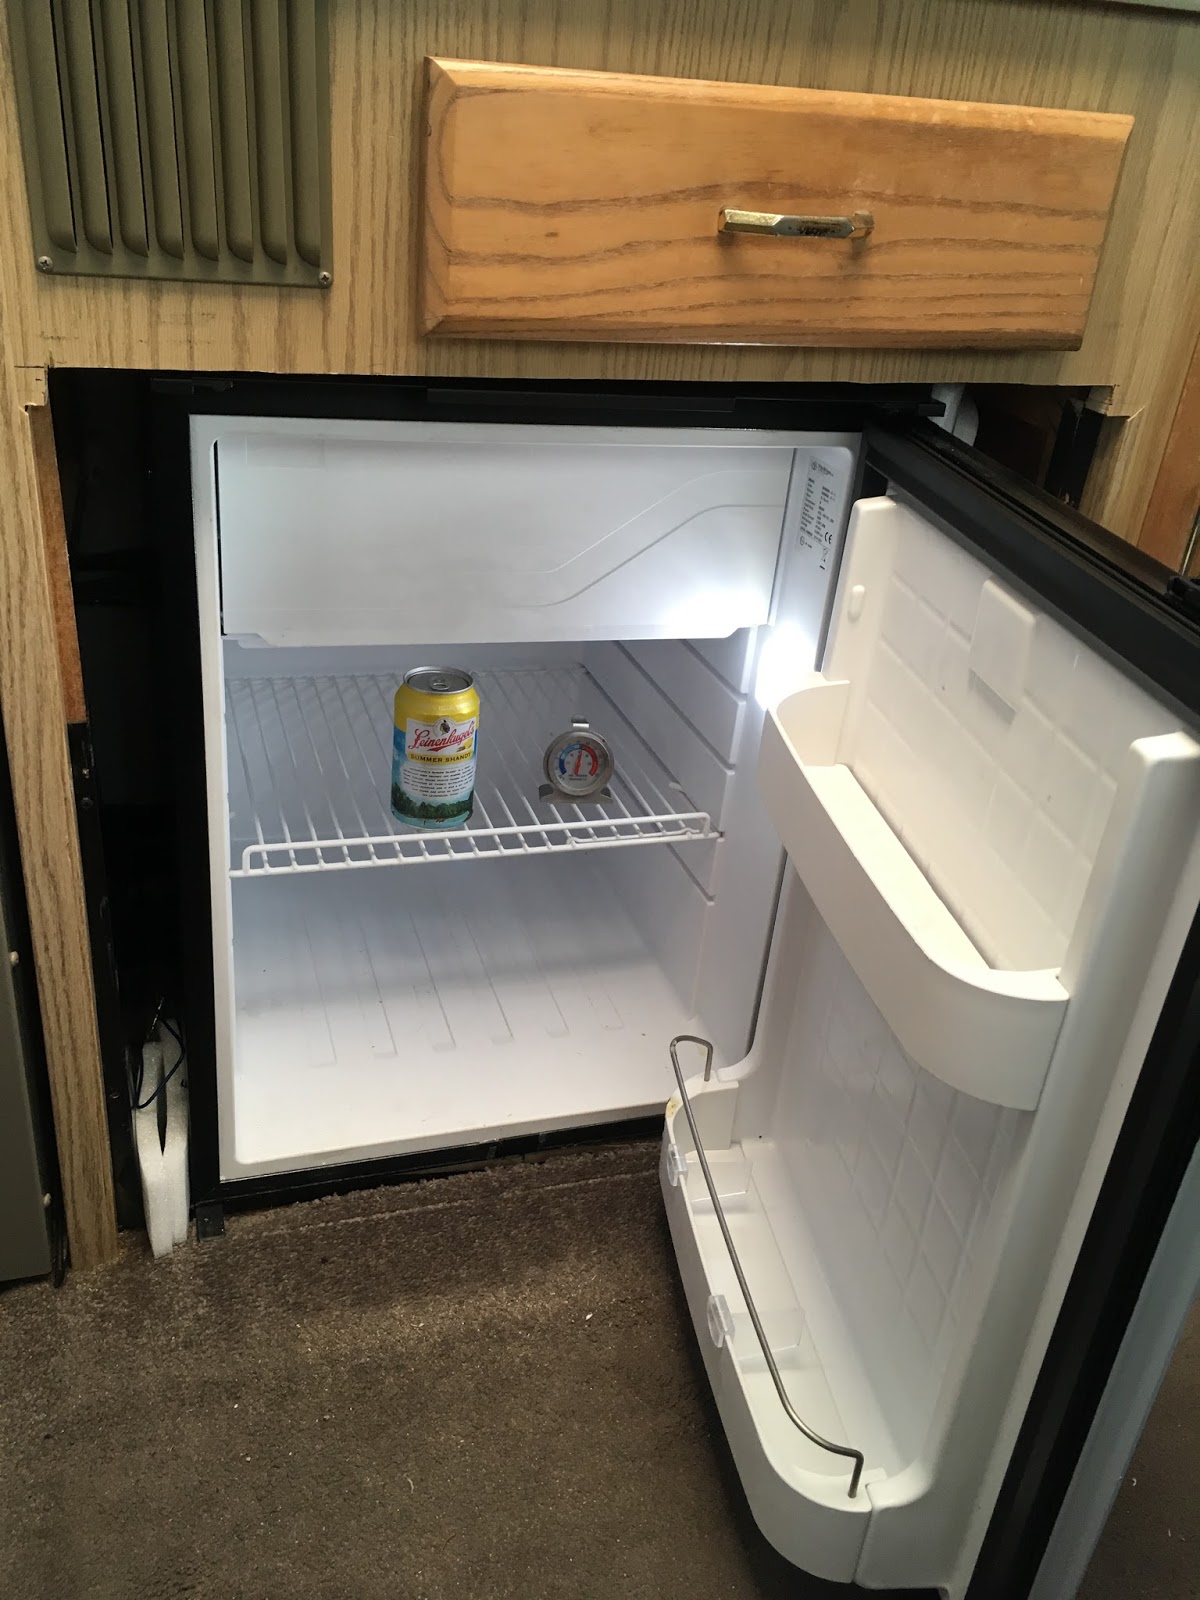
 |
| One of the dozen or so times I had the Norcold 3163 "three-way" refrigerator in and out of the rig while I was trying to get it to cool on propane. |
Understanding the logic behind the "three-way" refrigerator is a great entry point for understanding the basics of the electrical systems in an RV, which in turn is necessary to understand how solar gets used in anything from an RV to an off-the-grid cabin to a house. Anything that calls itself an RV has three power sources:
1) There is 120 VAC (household electricity), which is usually supplied in two ways. Any RV has a "shore line," a fat extension cord that allows the RV to be plugged into "shore power" and supplies 120 VAC to the RV to run its integrated high-demand appliances such as the rooftop air conditioner, the microwave, and the refrigerator. Connecting to shore power also makes 120 VAC available at the RV's electrical outlets where you can plug in computers, hair dryers, or just about anything else. A campground that lets you plug in your shore line and connect your water hose is said to have "hook-ups," and yes, when you combine that with having a "three-way," taking your RV to a campground sounds like a swinging good time. If instead you are "boondocking" (meaning using the RV off the grid at a site without a hook-ups), most RVs have an on-board generator that produces 120 VAC. Generators are loud, though, and many campgrounds have generator-quiet hours between 10pm and 7am. From a power standpoint, the RV doesn't care whether the 120 VAC is coming in via the shore line or is produced by the generator. In fact, on my Rialta, to use the onboard generator, you literally plug the shore line into it.
 |
| The Rialta's shore line snaking into my house |
 |
| Where you plug the shore line into the Rialta's generator output. |
 |
| The Rialta's two coach batteries. |
If you think about it, it's funny that the refrigerator allows a choice of all three sources of power. I asked myself why. Nothing else on the RV does that. The heat, for example, is only propane; it's not propane and 12V in case you run out of propane. The microwave, for example, is only 120 VAC; it isn't 120 VAC and propane (though the idea of a propane-powered microwave is inherently funny).
It's not that the three-way fridge is giving you a Swiss Army Knife-like choice of all three sources of power to be flexible. It's meant to be run in a very specific way. Three-way ammonia absorption refrigerators don't get things as cold as quickly as your household refrigerator. You need to think of them as maintaining cold rather than producing it. Here's how you're supposed to use a three-way fridge. You're supposed to plug your RV into shore power at your house for 24 hours before a trip, set the fridge to run off 120 VAC, get it nice and cold, then transfer food and drink that you've already chilled off in your household fridge into it. Then, when you leave on your trip, you unplug the shore line and set the fridge to run off 12 VDC (the coach batteries). When the fridge is running this way, it draws a lot of current, about 15 amps, which is okay while you're driving because the alternator is keeping the coach batteries charged, but that amount of current can drain the coach batteries if you try to run it that way overnight. For this reason, when you arrive at your destination, you set the fridge to run on propane and light it. Propane is an incredibly efficient method of off-the-grid refrigeration. You can run a three-way fridge for days on a small propane tank. That is, if it works, if the RV is absolutely level, and if it's not too hot inside the RV.
If you think about it, the fridge is unique among the things in the RV that require power. Other devices like the interior lights or the fresh water pump or the water heater only need to spring to life when you require their services, but the refrigerator has to have power all the time so the beer stays cold (or, as Maire Anne says, so the chicken doesn't spoil and make you violently ill, and so there's half-and-half for the coffee in the morning). Without the propane setting working in my three-way fridge, it was only useful while the rig was plugged into shore power, while running the generator, or while driving. During generator-quiet hours, there was no way that the coach's two batteries could support a continuous overnight 15-amp drain from running the three-way on 12 VDC. So, really, it was useless.
Obviously, I was not the first one to have this problem. Three-way refrigerators have a mixed reputation. Propane refrigerators work great for applications like off-the-grid cabins, but don't play well in the RV environment due to motion, jostling, moisture, and high interior temperatures. Many RVers report that, when their three-way died on the road, they ran into Walmart and bought a $100 dorm refrigerator to get by. As long as you have 120 VAC, meaning shore power or the generator, that'll work fine, but if you don't, you have to create 120 VAC by hooking up an inverter (a device that converts 12 VDC to 120 VAC) to the coach batteries.
The problem with inverters is that they're inherently inefficient. It's always preferable to find a device that runs directly off 12 VDC than to use a device for which you need to convert 12 VDC to 120 VAC. So when trying to run a refrigerator through an inverter overnight, you run into the same issue that you'd have trying to run the three-way off 12 VDC--that the current requirement is enough that it can drain the batteries.
Danfoss Compressor Low-Power Refrigerators
The solution to this problem appeared to be two-fold. First, select a refrigerator that uses a recent breed of compressor called a Danfoss compressor (also called a Secop compressor, as Secop purchased Danfoss). Unlike compressors in household refrigerators that are designed to run off 120 VAC, Danfoss compressors are designed to run directly off 12 VDC. They are used in many RV, boat, and camping refrigerator and freezer configurations, including both flush-mount refrigerators and top-lid coolers. Most of the spec sheets claim power requirements at around 3 amps, which is low enough that two fully-charged coach batteries should be able to support it running overnight, especially since the fridge isn't running constantly; it cycles on and off.
But the second part of the solution is to keep the coach batteries fully charged. As I said, the coach batteries are charged by the vehicle alternator while driving, and by the onboard chargers when they receive 120 VAC either from shore power or from the generator. But the key is to keep charge flowing to the coach batteries, while parked, with no 120 VAC. And that's where solar comes in.
Solar Panel + Controller = Battery Charger
A solar panel together with its controller acts as a battery charger, taking whatever amount of sun is hitting the panel(s) and using it to charge the coach batteries. It's just like an alternator. It's just like an external battery charger. It's really that simple. In addition, if you like, you can power devices directly through the controller or hook up an inverter to generate 120 VAC from the coach batteries (and we'll get back to that), but fundamentally, solar charges the coach batteries.
The Appealing-Sounding Inexpensive Renogy Packages
For me, the whole solar thing started when I read on the Riata Tech Forum that a company called Renogy sells a package on Amazon with a 100-watt panel, a controller, and all cabling for $189. That was an eye-poppingly appealing price. Why, I thought, wouldn't I want to install that in the RV? Well, because it's not quite that simple.
Let's start with the whole issue of capacity. How much solar do you need? There are entire web sites devoted to this calculation. It starts with Ohm's Power Law:
Power = Current times Voltage (P=I*V)
Or, solving for current,
Current = Power divided by Voltage (I = P/V)
So, if you have a 100-watt panel supporting a 12 volt system, the most current you can expect out of it to charge the coach batteries is 8.3 amps.
Now, since what I was trying to do was charge the coach batteries during the day so they could run a 3-amp refrigerator overnight, this actually sounds pretty good on paper. But that's assuming that you have full sun shining on an optimally-angled panel, with no losses in power generation, all the time. You're never going to have that ideal case.
Remember: The solar is only being used to keep the batteries charged. Stepping back for a moment from the calculation, when you take solar out of the picture and look only at battery capacity, there are three main factors at work:
1) The total electrical load you need to support. This was well-defined and pretty modest: I needed to charge the batteries during the day to run a 3-amp refrigerator overnight.
2) The number and size of the coach batteries. My Rialta has two marine-quality deep-discharge batteries, each with 125 minutes of reserve capacity. That's the number of minutes a battery can support a 25-amp load before being discharged to 10.5 volts, which is the absolute lowest voltage you'd want to run a battery at without damaging it. I prefer not to run batteries that low; 11.5 volts is a number I'm more comfortable with. Reserve capacity is usually printed right on a deep-discharge batter, but for this and other reasons, it really isn't a terribly useful number except for comparing batteries to other batteries.
3) The age and health of the coach batteries. The receipts from the Rialta show that the coach batteries were replaced a few years ago, but battery health is a funny thing. Age is important, but a few deep discharge events can kill a battery. If they seem like they are discharging quickly and are unable to support the production of a certain amount of current over a certain amount of time, then they're probably bad, regardless of their age.
With that in mind, you can begin to consider how much solar you need. Basically you want as much as your roof and your battery stack can support, but it is possible to have more than you can use. Let's put the problem this way. If you put ten 100-watt panels on the roof and sides of the RV to generate a thousand watts of power (or 83 amps of charging capability), and if you only have two batteries, the effect would be that the system could charge the batteries quickly (indeed, too quickly; batteries can't absorb 83 amps, and much of that would be wasted), but it would have no effect whatsoever on how much reserve power you had in your two batteries once the sun went down. To increase the amount of reserve power, you need to first make sure that your batteries are in good shape, and if that's not enough, increase the number of batteries. Larger RVs routinely support four batteries. But in my little Winnebago Rialta, there is only space for two batteries in the coach battery tray. I could jury-rig more batteries on the floor of the RV, but even the safety issues notwithstanding, the floor space is very small. So that's what I've got.
What this meant to me was that 100 watts probably wasn't quite enough.
Now, the inexpensive Renogy systems claim to be expandable--that is, you can hook an additional panel into the controller. The cost of the panels themselves are about $1.30 a watt from Renogy, and about a dollar a watt if you shop around. Or you can buy a 200-watt bundled package from Renogy for $340.
So, either an inexpensive 100-watt system to which I could later add another 100-watt panel, or a 200-watt system Why wouldn't I want to pull the trigger on one of these options?
I nearly did. But I needed to first be certain that, mounting one of Renogy's 100-watt panels on the roof, I'd be able to mount a second one, and that turned out to be a problem.
Location, Location, Location
I began carefully examining the roof of the Rialta. It's a small RV whose roof is obstructed by the cut-outs for the air conditioner, the vents for the shower and the water tanks, the skylight, and the TV antenna, though this latter obstruction could be removed. Further, the Rialta's roof isn't flat; it's curved toward the edges on the side. There was basically one sweet spot, near the center of the roof, in front of the air conditioner and behind the skylight. It turned out that I could fit one of Renogy's 47"x21" 100-watt panels in that spot, but not two, and that, in fact, due to the curved roof, there was no easy way to fit a second panel anywhere else.
 |
| The Rialta's roof is small, curved on the edges, and has one sweet spot in the middle. In terms of sizing a panel to fit there, you need to make it count. |
This quickly settled into three issues. The first was designing a system that would be expandable, where I could spec out one panel for starters but where the rest of the system would support several more panels. The second was finding the first panel that was the right size for the sweet spot on the roof. The third was finding the right controller. Together, these required walking away from the idea of buying an inexpensive bundled package from Renogy. As a result, the cost increased sharply from the original $189 for a 100-watt Renogy system, but it satisfied my requirements.
I should also note that another option is to buy a portable folding panel setup like this. The upside is that no permanent rooftop panel installation is required, and you can orient the panels optimally at the sun to increase their output. But the downside is that you have to deploy the panels. For solar to work best for something that always needs to be on, like a refrigerator, you want the sun hitting those panels as often as possible, not just when it's convenient for you to put the panels out. You want the sun hitting them first thing in the morning, when you have the RV at the beach, when you're running into the convenience store to buy firewood, when the rain is clearing, etc. Plus, knowing me, who has, in fact, driven off once with the the shore line still attached, I was likely to drive off with the panels precariously perched on the roof. I concluded that portable panels would be great for on-demand charging, but that I wanted fixed panels.
Expandability
The expandability requirement meant coming up with a total maximum wattage. This would affect both the controller and the size of the cabling. I figured that, as an upper limit, I'd assume one 160-watt panel (see below) plus the option of two additional 100-watt panels, for a total of 360 watts. Using the I=P/V formula, that meant buying a controller and cabling capable of supplying 30 amps.
The Right-Sized Panel
With a little searching, I found that there was another common form-factor for the panels--58"x26". These had two advantages over the 100-watt 47"x21" panels. First, they output not 100 watts but 150 or 160 watts. And second, they optimally fit the sweet spot on the roof, though the right edge of the panel would clearly be over the roll-off on the side of the roof and I'd need to figure out how to mount it securely there. Renogy didn't sell panels this size, but they were available through several other vendors on Amazon. Although none of them had Renogy's history of thousands of reviews, I was comfortable enough to pull the trigger. I found one for $165 (still about a dollar a watt) on Amazon from "Eco-Worthy," clicked, and waited for it to arrive.
As I said, I figured that, if necessary, the Rialta's roof space could support two additional panels on the sides of the air conditioner, though their long axis would be hanging off the roll-off on the sides of the roof. I learned that, in addition to the traditional rigid panel I'd bought, there are flexible panels, sort of like floor mats, that are popular with owners of Airstream trailers with curved roofs, and that might make for an easier installation. The flexible panels are more like $1.60 per watt, but can reportedly be installed quickly and easily with Very High Bond (VHB) tape. They also reportedly aren't quite as efficient as traditional rigid panels due to the increased temperature they run at because of the lack of air space beneath them. I mentally filed all this information in case I needed it down the road.
The Right Controller
People fixate on the panels, but the controller is really the heart of the system. It's like a car's alternator or a battery charger. It takes the input from the one or more solar panels, each of which might be outputting between 8 and 20 volts, looks at the state of charge of the batteries, and figures out how much current and voltage to send to them.
One of the advantages of breaking off from buying a package from Renogy was that I could select the controller a la carte instead of being forced to accept only the ones that they offered in their package. However, there was hit in cost from this, as I was losing a package discount. This was traded off against the fact that Renogy's controllers had mixed reviews on Amazon. Of course, I soon found that any controller except the most expensive ones had mixed reviews on Amazon.
You can spend whole evenings reading up on controllers. They divide up into two main categories: Pulse Width Modulated (PWM) controllers and Maximum Power Point Tracking (MPPT) controllers. You can read more about both of them here and any number of other places.
PWM controllers are inexpensive; you can find them on Amazon for $15. As with anything inexpensive and Chinese-made, though, you get what you pay for, and reviews of inexpensive controllers often have a "bump in the tail," meaning that you see a bulge in "1"-category reviews caused by people reporting that the product failed after a short amount of time.
MPPT controllers claim to do a better job charging the batteries in a larger variety of conditions, and are substantially more expensive. When you find ones that are inexpensive, you can sometimes follow the web trail and find reviews from engineers who have taken them apart and say that they're not in fact MPPT controllers at all (e.g., fraud is being committed).
Now, the web is a big wonderful place, and you can find all sorts of opinions and decide which ones you want to listen to. There are websites for boutique solar installation companies who sound highly passionate and reputable and say that all Chinese-made panels and controllers are garbage and that what you want to do is select from only these three Japanese-made panels and these five American-made controllers. It all depends what you're comfortable doing. For a solar package in a lightly-used RV, I had nothing against buying inexpensive Chinese-made panels, but I did want an expandable MPPT controller. I smiled when I found several videos from Australian electrical engineers with a lot of sunshine and time on their hands who opened up a few moderately-priced Chinese-made MPPT controllers and, in one of the videos, commented favorably on the size of the inductor and the wiring.
The other requirement for a controller is a display. You need to be able to look at the controller and know what it's doing--how many volts the panels are producing, and what voltage and amperage are being directed into the battery. You also need to be able to configure the controller and select between options for charging the different kinds of batteries. Some controllers have a simple integrated LCD display, but some literally have no display at all, and instead require you to purchase a separate display unit.
For these reasons, I bought a SolarEpic 3210A 30-amp MPPT controller for about $120 on Amazon. It offered the headroom (30-amp capability) I wanted for expandability, it was reviewed by the Austrailian gentleman on youtube as being a well-built MPPT controller, and it had a simple integrated LCD display.
Cabling and Breakers
Cabling is required between the panels and the controller, and between the controller and the battery, and we're not talking spagetti-thin speaker wire. This is a substantial amount of current we're talking about. You can buy cables with ready-made ends, or you can roll your own. As with the panel wattage, there are web-based calculators you can use to determine the wire gauge you need to carry a certain amperage over a certain distance with a certain loss. With wire gauge, smaller numbers represent thicker wire. For a 100-watt (8.3 amp) system and short (20-foot) cable runs, 12-gauge cable is probably sufficient, but because I wanted the system to be expandable to 30 amps, I stepped it up a size or two.
I elected to buy Renogy cables for the panels, as they already had the MC4 connectors needed to connect them to the panels, but I bought the 10-gauge instead of the standard 12-gauge cables to enable the possibility of adding additional panels. I kept the cabling short, ordering the 10-foot cables rather than the 20-foot ones, to hold down power losses. This was a gamble, as I hadn't yet scoped out exactly where the panel or the controller would go, and hadn't run a rope or anything to be certain that 10 feet of cabling were sufficient.
For the controller-to-battery cables (what are sometimes called "tray cables"), Renogy sells a 10-gauge tray cable set with pre-crimped ring terminals for the battery connections very inexpensively (like $13) on Amazon. It would've been fine, but for reasons of expandability (more panels means more wattage going from the controller to the battery stack), I elected to go with 8-gauge. I bought the cables and crimped on the ends myself.
The inexpensive bundles that Renogy sells have the panel wired directly to the controller, and the controller wired directly to the battery, without breakers or fuses of any kind. You really want, at a minimum, a switch to be able to disconnect the panel feed from the controller, and a fuse on the feed to the battery. I bought two Anjoshi inline circuit breakers from Amazon for about $13 each, as these function both as a switch and as a fuse. I wired one on the positive lead from the panel, and the other on the positive lead to the battery.
Mounting the Panel
Mounting the solar panel on the Rialta's roof was a carefully-planned, nerve-wracking experience. First I needed to figure out exactly where it needed to go. Before the panel arrived, I cut out cardboard of the proper dimension and verified the candidate mounting area in the roof's sweet spot.
 |
| Planning the installation of the 58"x26" panel. |
 |
| Test-fitting the panel. |
 |
| Due to the roll of the roof, it was clear that the right side of the panel (at a minimum) needed adjustable-height brackets. |
I knew that there would be no substitute for having several mounting options in my hands and trying them out, so I ordered four types of feet--Renogy's Z-brackets, RVSC adjustable smart feet, RVSC adjustable sticky feet with pre-applied VHB tape, and ZAMP solar adjustable mounting brackets, verifying first with the vendors that I could return what I did not use.
 |
| Clockwise from upper left: Z-bracket, RSVC smart feet, RSVC sticky feet, ZAMP adjustable bracket. |
 |
| RSVC adjustable feet used on the ends of the panel to take up the difference in height caused by the roll of the curved roof. |
I carefully positioned the panel with the brackets attached, marked and punched their locations, then drilled the holes and cleaned the roof at those locations so the VHB tape would adhere properly. My son Ethan and I then affixed the VHB tape on the bottoms of the feet and very carefully lowered the panel onto the marked locations, taking great care to center the mounting holes. (In retrospect, I should've first applied the tape, set the panel down as close to the marked locations as I could get it, and then punched and drilled the holes :^).
 |
| Careful marking and punching |
 |
| Careful drilling |
 |
| Using sealant on the screw threads. VHB tape is underneath the bracket. |
 |
| Dicor sealant over the screw as well as around the corners of the bracket, itself already adhered with VHB tape. |
 |
| Ethan and I trying to get the brackets aligned to the already-drilled holes. |
 |
| Ta-DA! |
Mounting the Controller
The controller was, coincidentally, the perfect size to fit above the sink, next to the Rialta's small control panel. I was concerned about splashing from the sink, but a $3.47 piece of clear acrylic (Mcmaster-Carr, part number 4615T92) affixed by a piece of Velcro worked perfectly as a splash guard. This location for the controller also allowed perfectly for...
 |
| MPPT controller, breakers, and splash guard. |
Running the Cables Down from the Roof
Running the cables down from the roof into the interior of the coach is challenging. There are a variety of small bulkhead adapters you can buy that flush-mount to the roof, but I followed the advice on another fellow's blog and dropped the cable down the vent pipe for the fresh water tank. This required putting a cut-out into the top of the PVC pipe so the cable could enter it at an angle, then drilling a hole in the pipe where it passed through a cabinet in the RV. Again, this is a vent pipe for the fresh water tank (not a pipe carrying water, and not a vent pipe for the sewer tank), so the impact of drilling a hole near the top of the pipe should be minimal. |
| Panel cables run down inside the vent pipe for the fresh water tank. |
Well, it's always higher than you expect and than you'd prefer, isn't it? The big costs were $165 for the Eco-Worthy 160-watt panel, and $120 for the SolarEpic 3210A 30-amp MPPT controller. I spent $146 for four kinds of mounting feet, but got much of it back when I returned the ones I didn't use. Panel and battery cables were about $25 each. Little things like the breakers, VHB tape, Dicor sealant, properly-sized screws for the feet, ring terminals for the battery cables, and other odds and ends added up. The total was probably about $525.
And, So, How Does it All Work?
Perfectly. I think I nailed the proper panel wattage. When it's sunny out, the 160-watt panel keeps the batteries topped up so that, at night, the fridge can run. When I'm not using the RV, I leave it parked in my driveway, with the shore line unplugged, and use the fridge as a solar-powered beer cooler. If there are a few overcast days in a row, the battery voltage will get low (like 11.5 volts), but it bounces back when the sun hits the panel.
Oh. The fridge. Forgot to finish that story. After first replacing the Norcold 3163 with a new eBay scratch-and-dent Dometic CR-1065, having it die, and returning it, we spent real money and bought a Vitrofrigo C90IBD4-F 3.1 cubic foot Danfoss compressor-powered refrigerator (as Maire Anne said, "We have a yacht refrigerator in our RV"). The damned thing cost almost as much as both of our last two kitchen refrigerators combined, but it's larger than the Norcold that it replaced (I needed to cut about 1" into the wood above it), and it even has a little freezer that makes little ice cubes. For right now, the fridge is just sitting in the opening where the Norcold was. At some point I'll frame it in to clean up the installation.
 |
| The new Vitrofrigo refrigerator |
 |
| Yes, it's a solar-powered beer cooler. |
If Maire Anne and my RV-related power needs increase (if we begin watching a lot of TV or using our computers a lot at night, or if she makes good on her threat to take her sewing machine with her), I may need to add a panel and a dedicated inverter, but right now the 160-watt panel and no inverter (we try to run everything we can off 12 VDC) seems about right. As I said, if we need more, I may find that the acute limitation isn't solar capacity but battery capacity.
One of the things I always ask myself after one of these projects is "Knowing what I know now, what would I do differently?" And the answer is: Almost nothing. I sized the system well, and am happy with the expandability even though I may not need to take advantage of it. In this case, the only thing I can think of is that, to keep price down and the delivery time short, I bought a polycrystalline panel instead of the slightly more efficient monocrystalline option, but that's a paper doubt, not a real regret.
So The Great RV Solar Experiment has been a resounding success. The beer and the half-and-half stay cold. The chicken won't spoil. And, in addition, I learned a great amount that I can apply when I get around to outfitting the house with solar.
Not bad considering that it all started because the three-way wouldn't cool on propane :^)
Thanks for the thorough, understandable process. I bought a GoalZero 90 watt portable system that works for my lights and electronics, but starts beeping about 5 a.m. I've been considering adding a 100 watt panel to my 2005QD but can't bring myself to puncturing the roof. This report helps alot. Thanks!
ReplyDeleteThis comment has been removed by a blog administrator.
ReplyDeleteThank you for the well-written overview of your project. It will help me immensely when we add solar panels to our 2002 HD.
ReplyDeleteGreetings, I am about to purchase a Rialta and this sounds like it will be very helpful. I have read of people removing the generator and adding batteries there. I would value you thoughts on this. Thank you for this.
ReplyDeleteAramis, I can't really give you a rigorous answer. As I said in the piece, solar capacity and battery capacity need to go hand in hand. Doubling the battery capacity from two to four doesn't help you much unless you have the additional capability to charge them, which means additional solar panels on the roof. We haven't done any boondocking in our rig, or even any long trips for that matter--we've just used it for overnights at campgrounds Cape Cod and day jaunts to the beach. While we're at the campgrounds, we're on shore power, which charges the batteries. The one panel charging the two stock batteries has worked perfectly for running the fridge while we're out at the beach during the day.
Deletelook into the rialta generator replacement https://www.youtube.com/watch?v=pTE3dIgES00
Deletealso am considering SOK 200AH lithum batteries that are the same size as the flooded batteries and in the end i'll have 400 amp hours, also my onan still works and am actually able to run the AC while boondocking
Hi, question it looks like the screws used to attach the brackets to the rialta roof are self tapping, what are they grabbing onto? i understand the fiberglass is thin and the high density insulation and a wood laminate, is that enough grab to keep the panels secure? about to put 400 watts on my 2002 QD and want to make sure i do it right. as far as the refrigerator i went with the 3.3cuft ever chill and mounted it in the closet.
ReplyDeletethanks jorge.ferreira@jacobs.com
on my 2002 QD the refrigerator vents out the passenger side, i have replaced my 3 way with a 3.3cuft ever chill and mounted it in the closet, but have not removed the 3 way unit yet. my plan is to reuse the propane feed and vents for a propane water heater so we can have hot water while boondocking
ReplyDelete